Home > Training > Application Administrator > Move Faculty to New Department
Move Faculty to New Department
This article is no longer current. Please visit the updated version: View Updated Article
This article will show you how to move a faculty member's appointment from one department to another department.
Before you move a faculty member
Before you move a faculty member, confirm the following:
Prior approval forms
- The routing of a prior approval form is determined when the form is submitted. If you change the faculty's department while the form is processing through the approval workflow, the form will continue routing through the old department approval workflow. If the forms do not need to route to the new department or if the faculty member has no prior approval forms, move to step (2) Check the next fiscal year.
Fiscal years:
- Check to see if the faculty has appointments in future fiscal years. If yes, make sure you move the faculty to the new department for all applicable fiscal years.
The following will help you determine what steps need to be taken to move a faculty member with prior approval forms that have not been Accepted or Denied.
(1) Prior Approval Forms in Process - Check to see if the faculty member has any prior approval forms that are currently processing through the approval workflow for the applicable fiscal years.
- Select the App Admin tab.
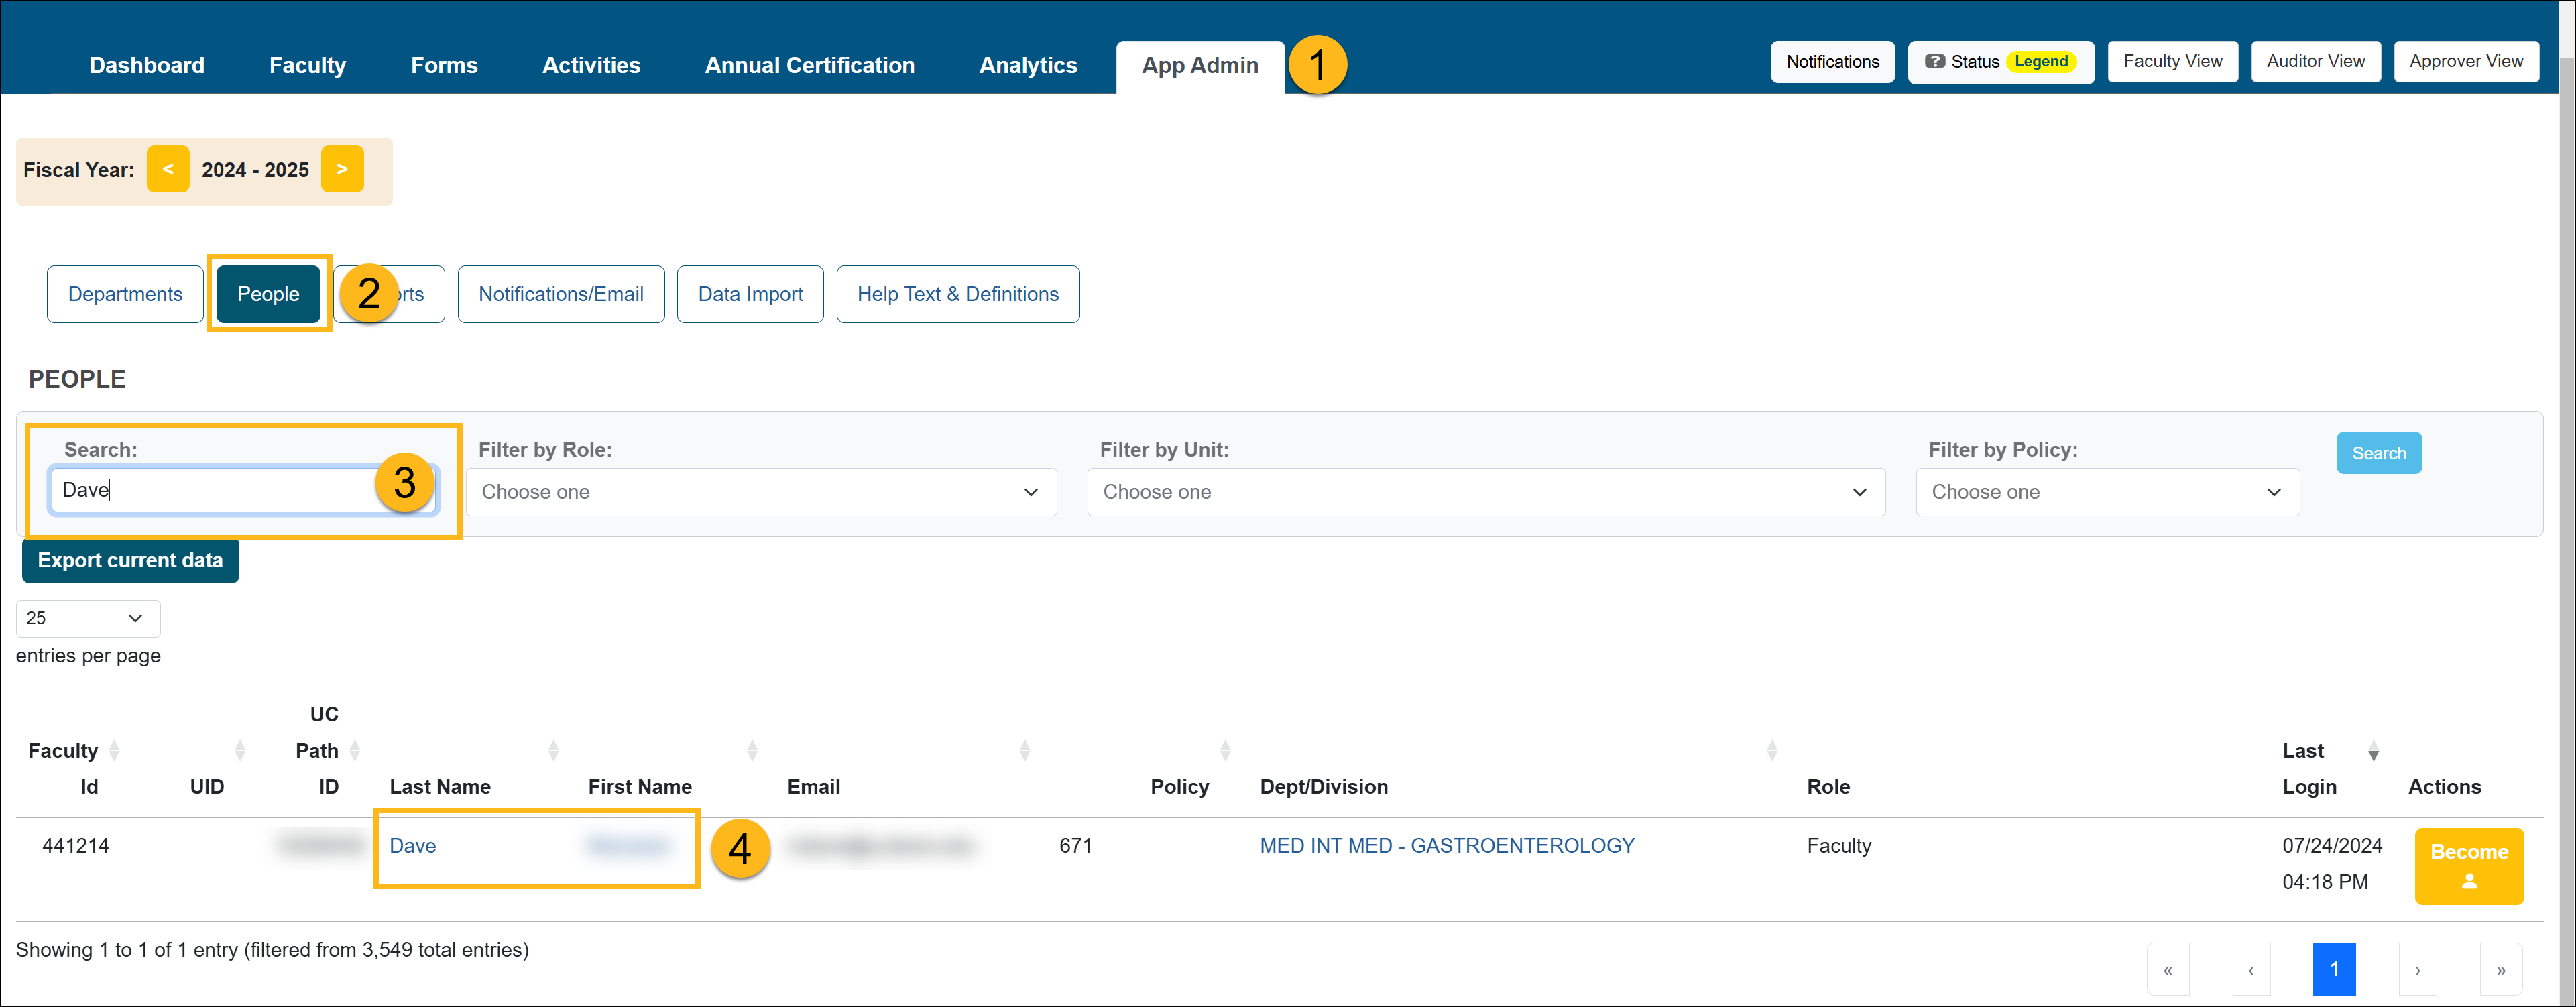
- Select the People button.
- Use the Search field to locate the faculty member.
- Select the faculty member's name to view their workspace details.
- Check the faculty's workspace for activities with prior approval forms for each of the applicable fiscal years (the fiscal year in which the faculty is moved to the new department and the following fiscal year).
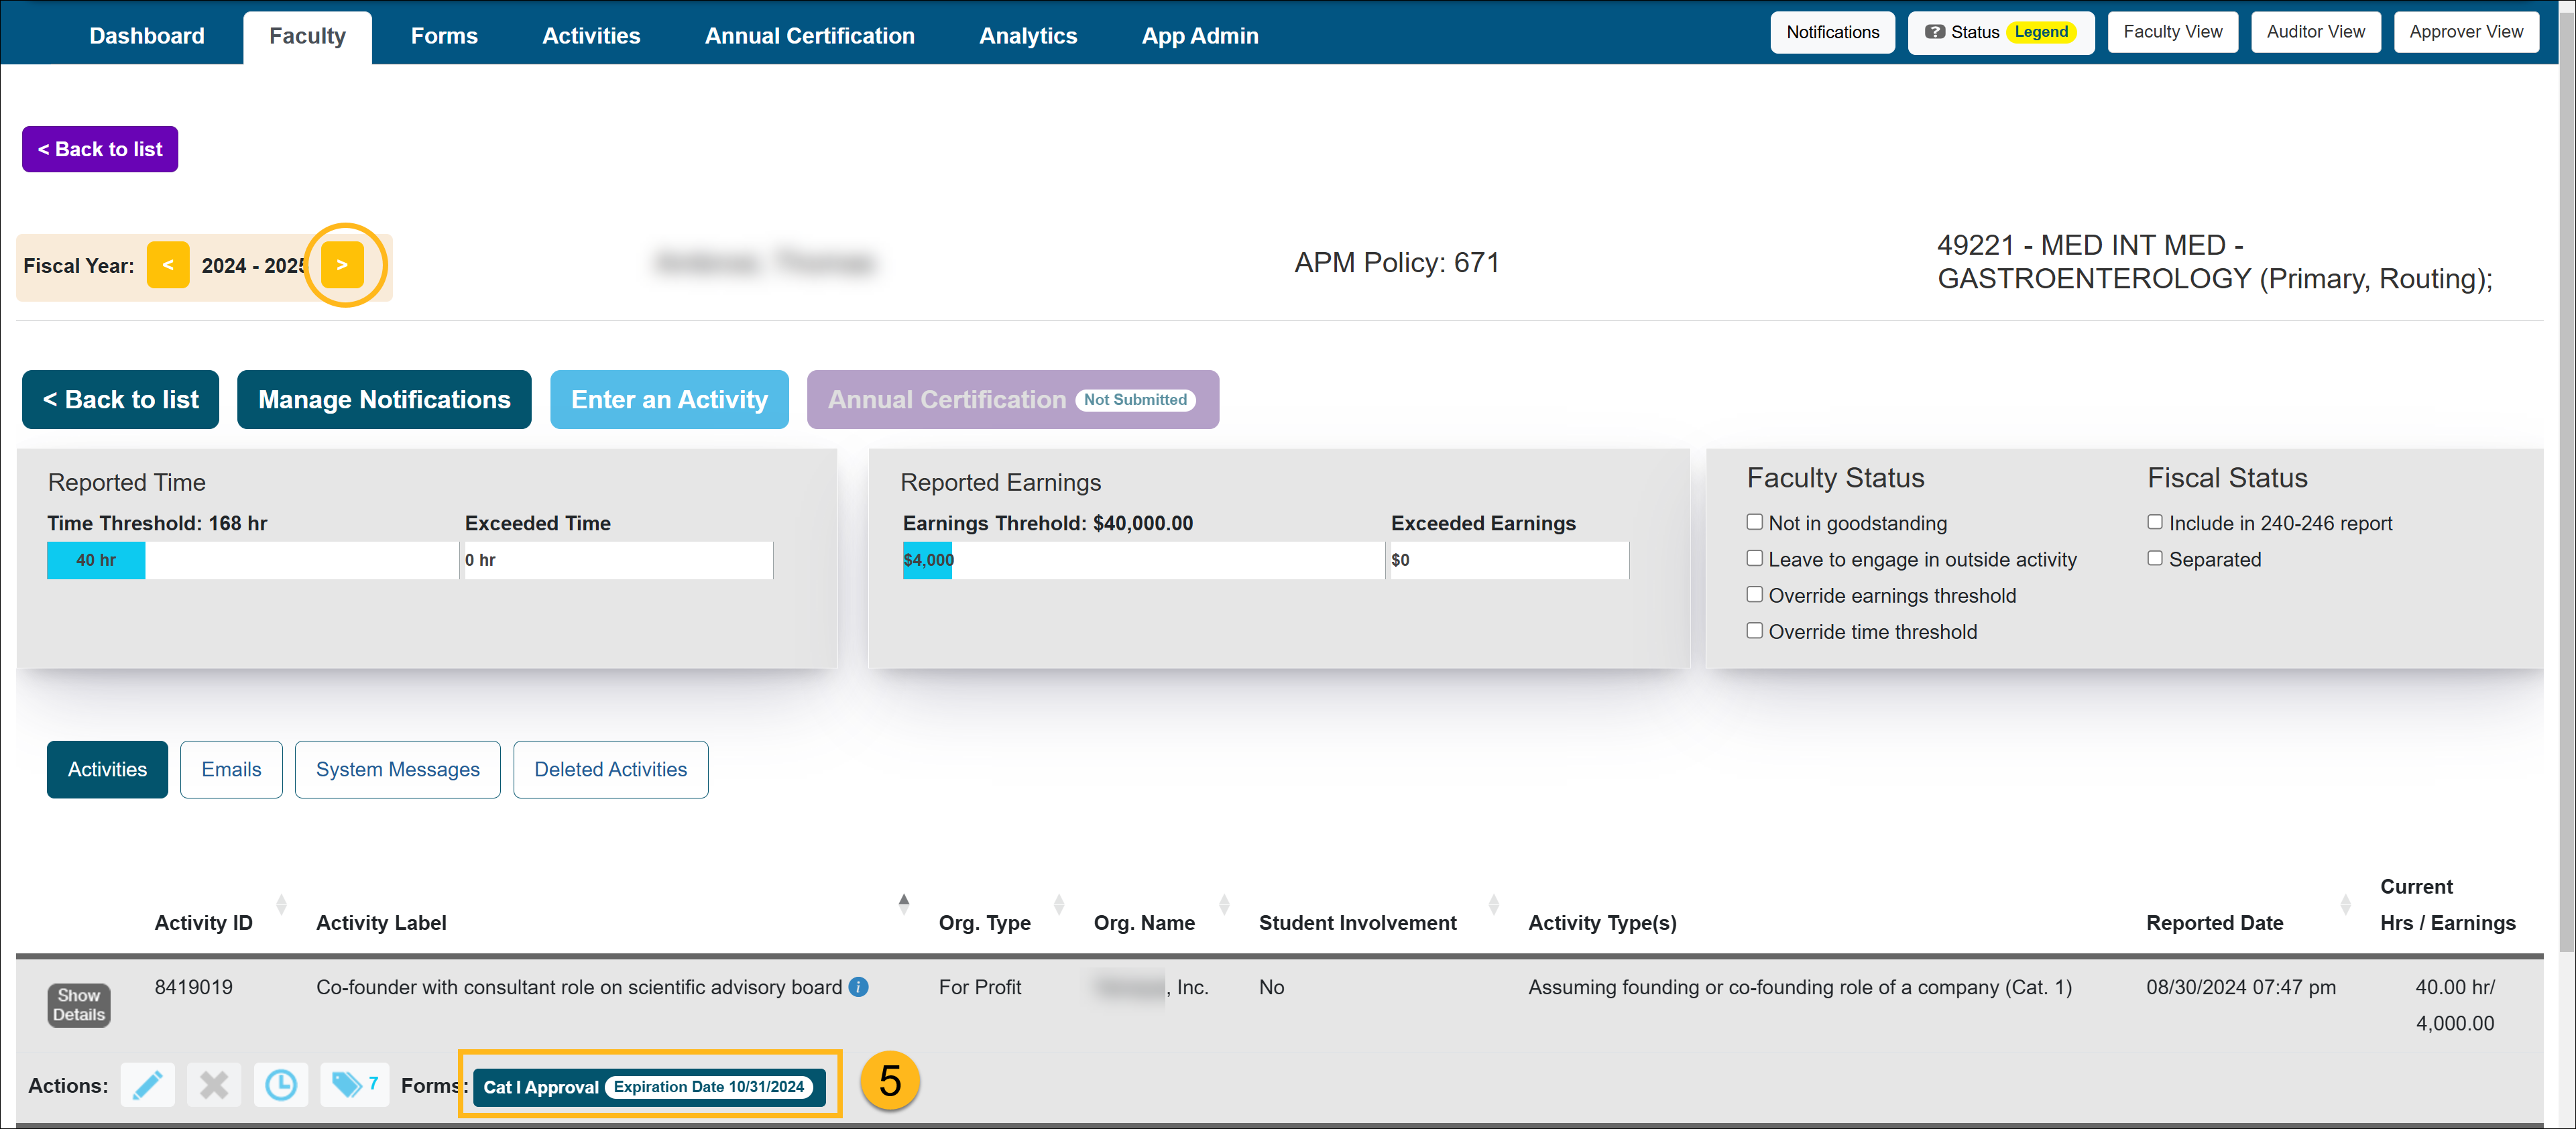
Options for Activities with Prior Approval forms
- Form status = Not Submitted - When the faculty member submits the form, the routing will be determined.
- Form status = Reviewer or Approver - If the prior approval form is processing through the approval workflow you will need to confirm the following: Does the new department share the same workflow as the old department (Same Dean, etc.)?
- Yes - If the prior approval form is at the Dean level or above you can safely move that faculty member because the workflow will not be disrupted.
- No - If the new department is under a different Dean or has not been processed beyond the Dean level you can wait for the form to be processed before moving the faculty or you can return the form to the faculty member and have them resubmit it after you move them to the new department.
- Form status = Approved - You can move the faculty member to the new department. Since the form is approved, you do not have to worry about the form workflow.
(2) Check the following fiscal year - Faculty can move their appointment into the next fiscal year. So make sure you check the current fiscal year and the next fiscal year for faculty appointments within their old department.
- Select the App Admin tab.
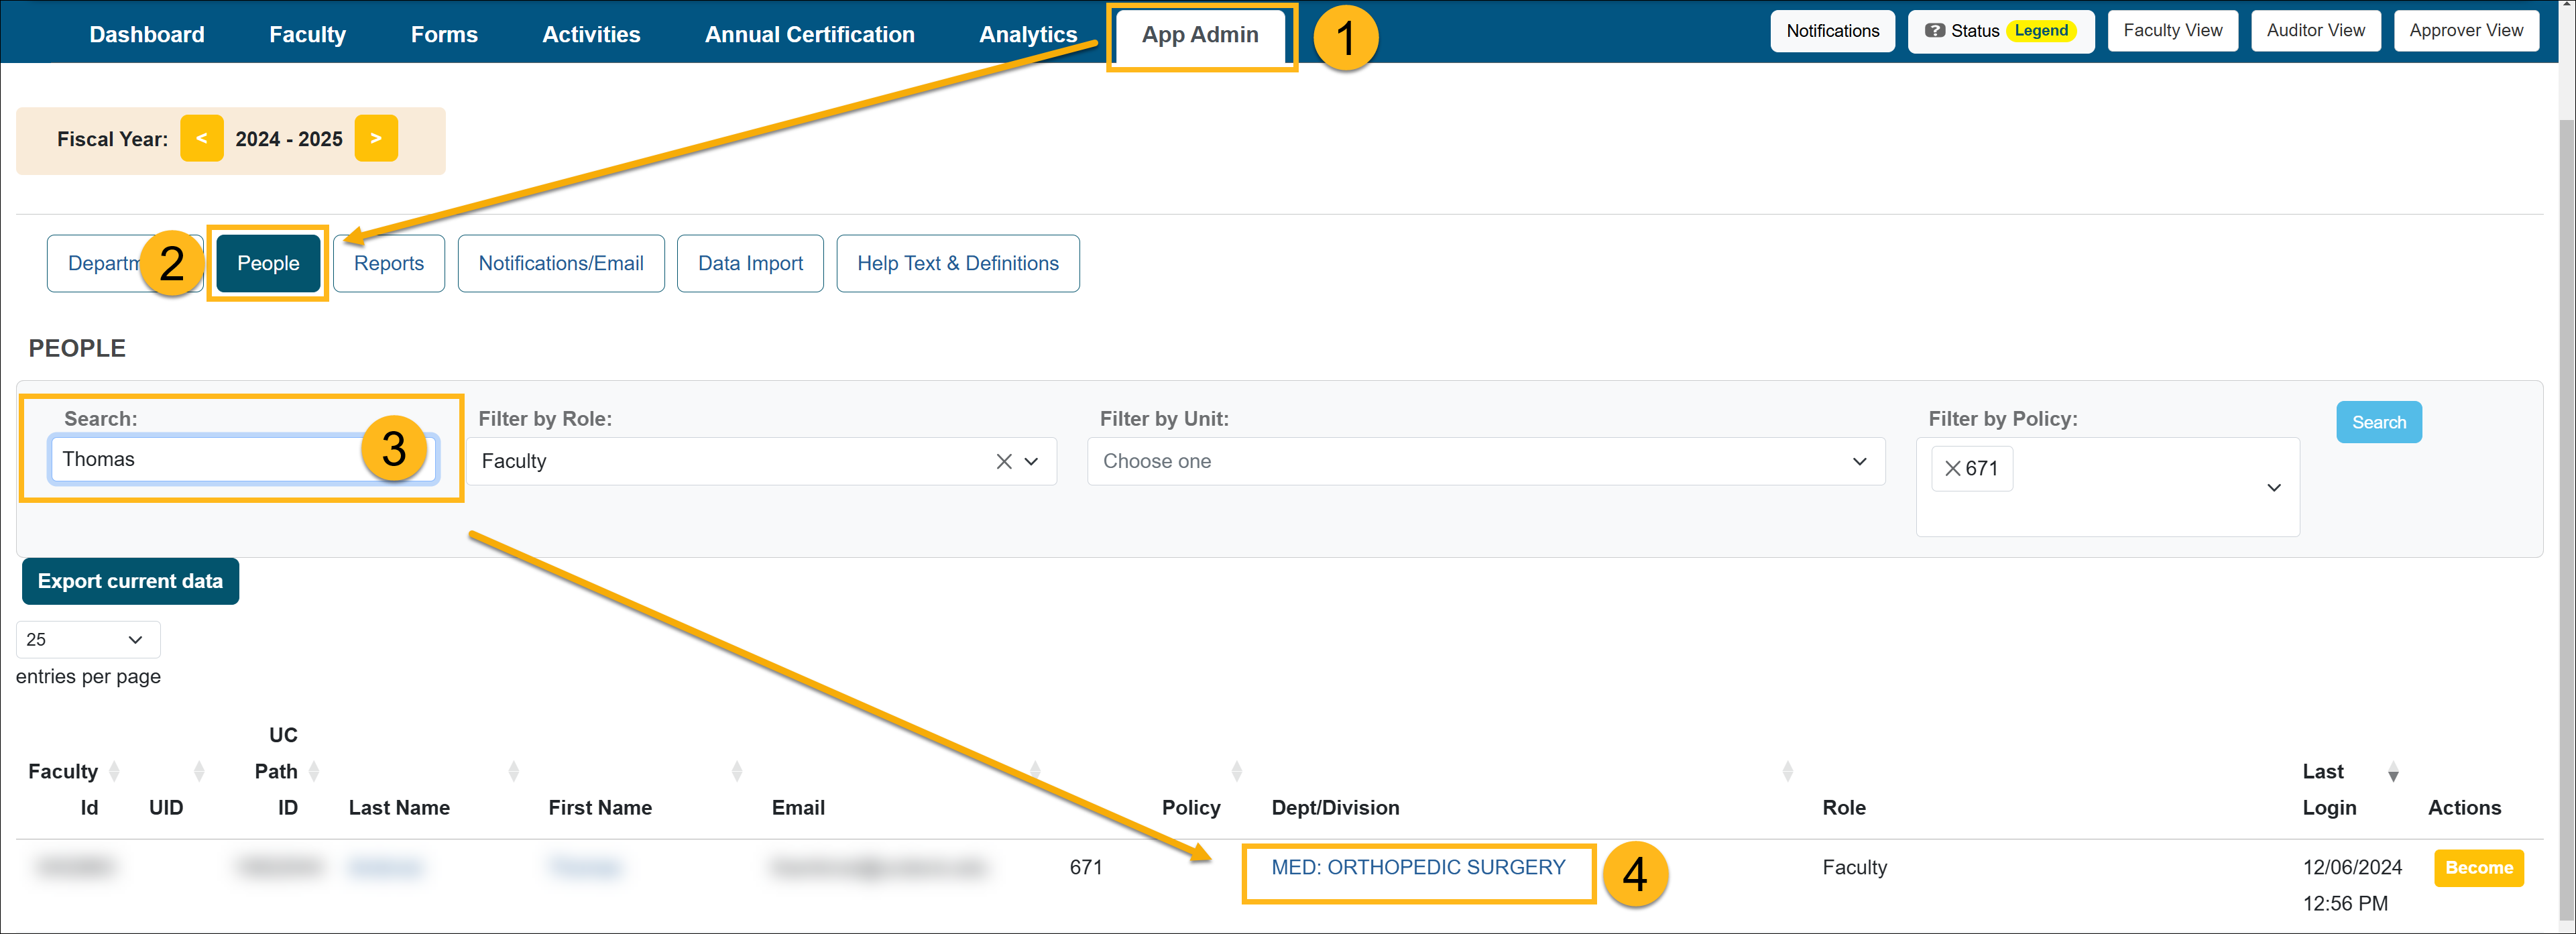
- Select the People button.
- Use the Search field to locate the faculty member.
- Select the faculty member's department to view appointment details.
- Move forward to the next fiscal.
- Select the Faculty button. Check to see if the faculty member is listed. If they do have an appointment in the next fiscal year, confirm if there are any prior approval forms before moving them. If yes, follow the above (1) Prior Approval Forms in Process.
Moving the Faculty Member
Once you have completed the above steps, you can move the faculty member by doing the following:
- Locate and select the new department.
- Confirm you are in the correct fiscal year.
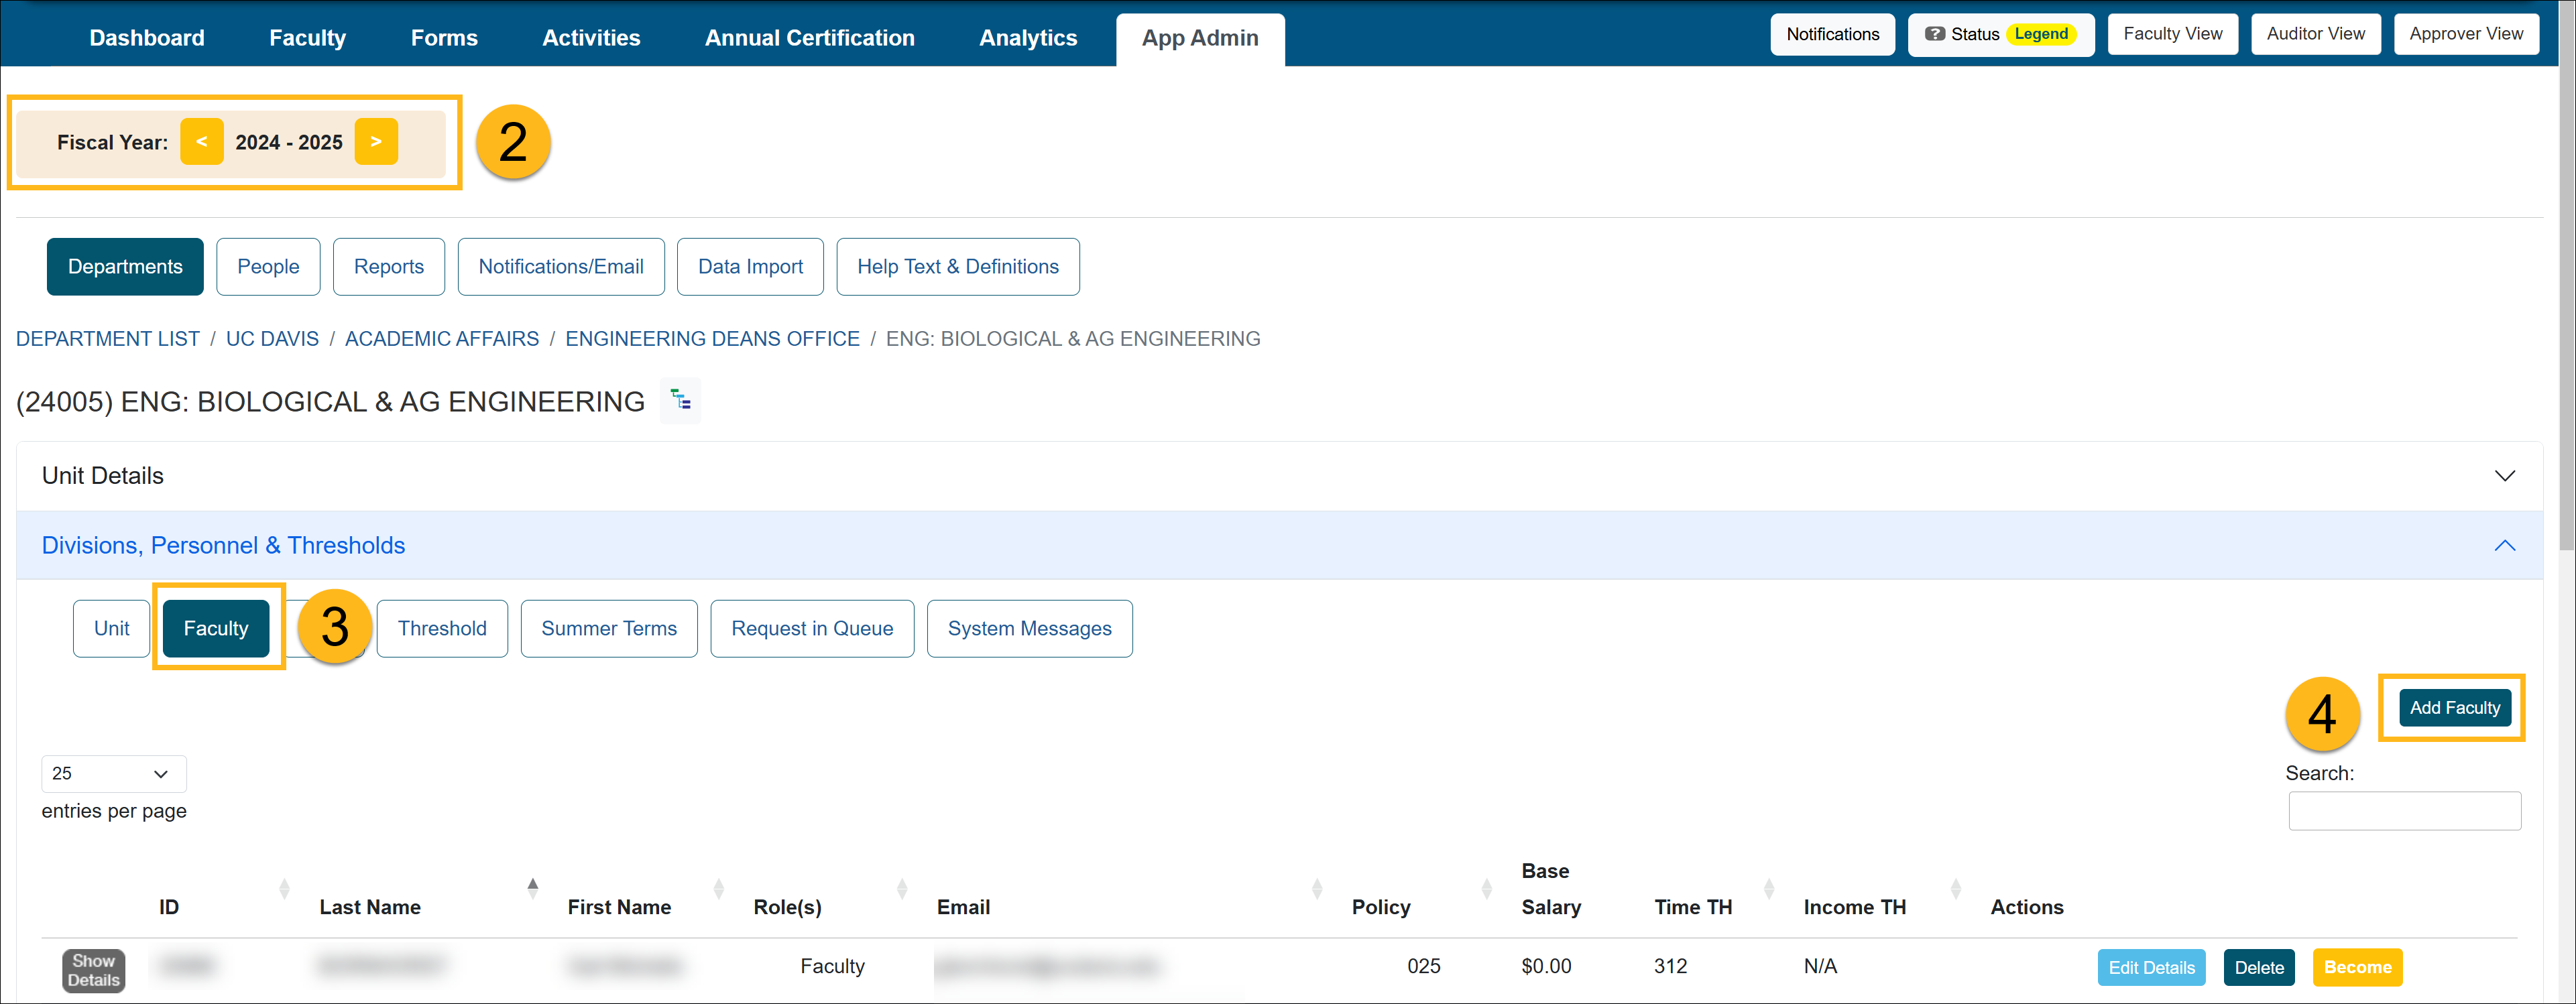
- Select the Faculty button and confirm the faculty member is not listed.
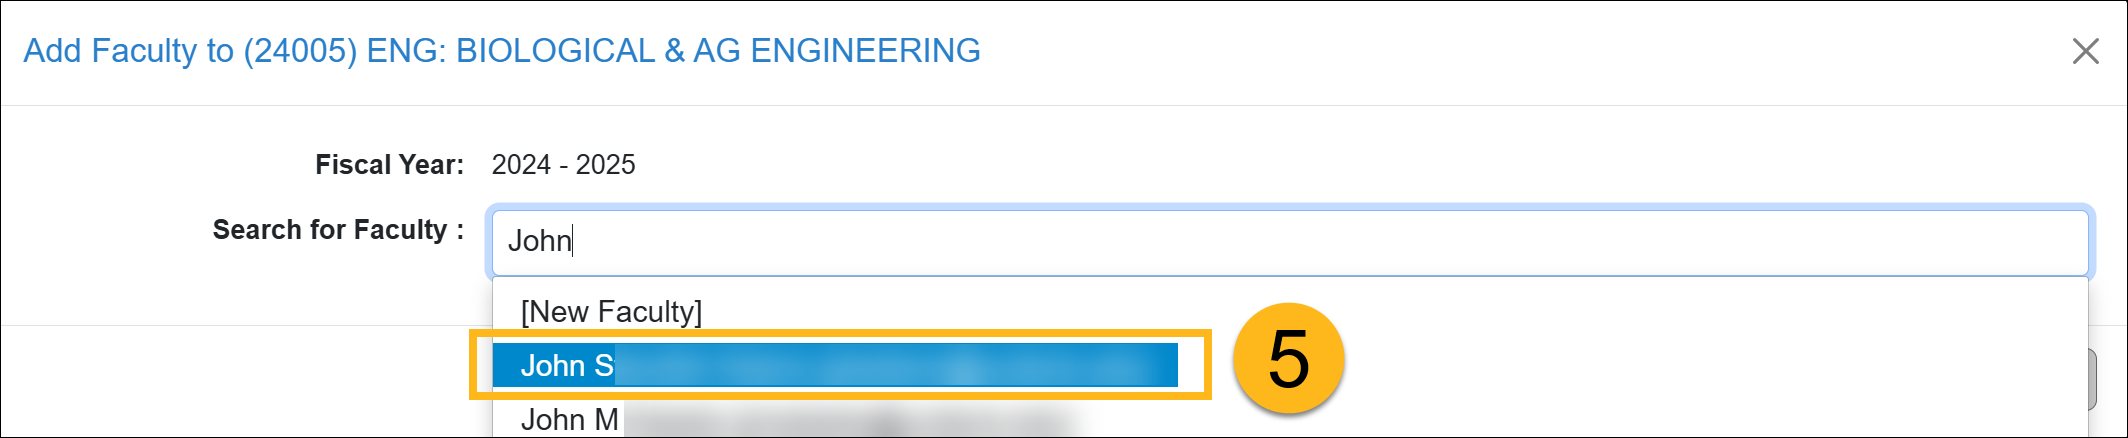
- Select the Add Faculty button.
- Enter the faculty member's name in the search bar and select them.
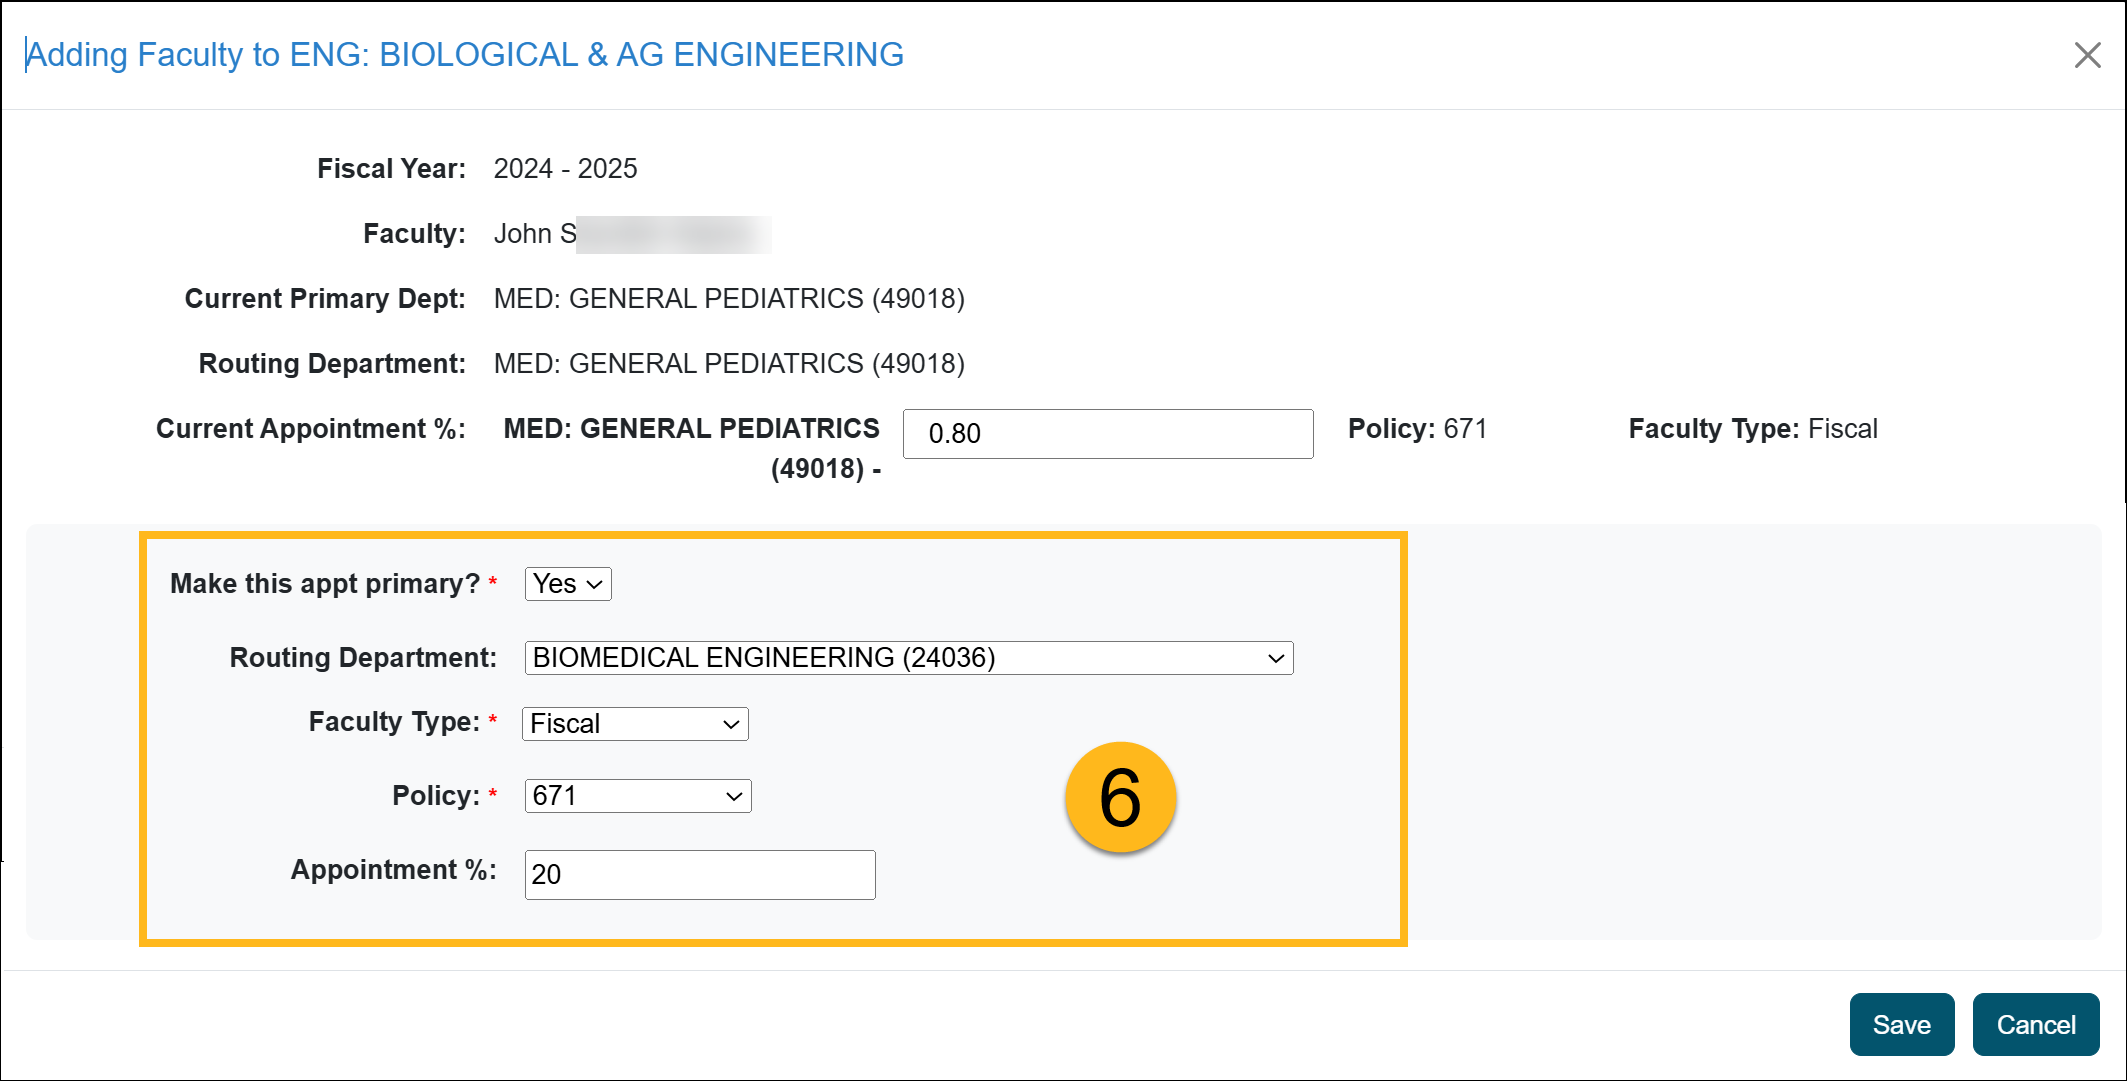
- Add the faculty member. Update the faculty's appointment information and make sure you update the Routing Department. Leave the appointment at 0%. Once you delete the old appointment, you can change this new appointment to 100% or the appropriate percentage.
- After you add the appointment, return to the old appointment and delete it. Follow this process for each applicable fiscal year.

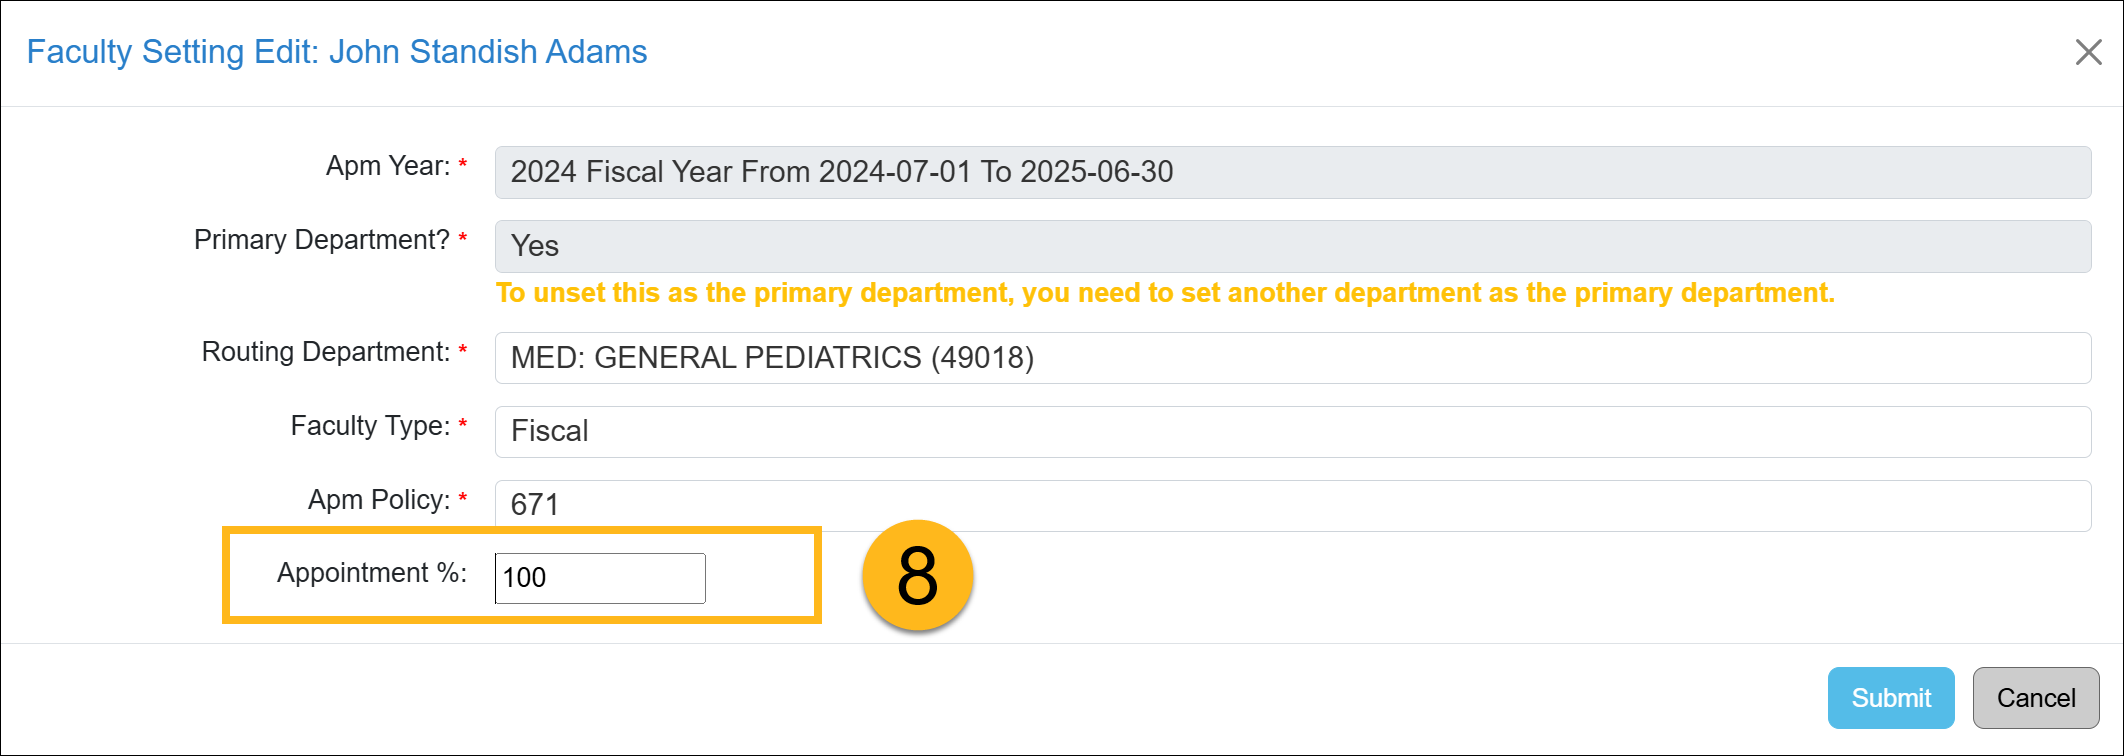
- Finally, return to the new appointment and change the Appointment percentage to 100% or the appropriate percentage.
Related Articles
Application AdministratorPeople Tab Overview
Adding New Faculty
Managing Faculty User Information
Editing Existing Appointments
Removing Existing Appointments
Adding a New Appointment
Move Faculty to New Department
Setting New Appt. to Primary
Setting New Appt. to Non-Primary
Adding New Staff
Managing / Deleting Staff
Change Staff Email Address
Campus Help Sites
UC Berkeley
UC Davis
UC Irvine
UC Los Angeles
UC Merced
UC Riverside
UC San Diego
UC San Francisco
UC Santa Barbara
UC Santa Cruz
UC OATS Portals
UC Berkeley
UC Davis
UC Irvine
UC Los Angeles
UC Merced
UC Riverside
UC San Diego
UC San Francisco
UC Santa Barbara
UC Santa Cruz
APM Policies
Academic Personnel & Programs
APM-025- General campus faculty
APM-671- Health sciences faculty
APM-240- Deans
APM-246- Faculty Administrators (100% time)
Last Modified: 2023-03-15 09:54:35.157599-07