Home > Training > Application Administrator > Faculty Separation Data Import
Faculty Separation Data Import
The Faculty Separation Data Import feature allows you to separate faculty members from UC OATS using a data upload. Faculty may also be separated manually within UC OATS.
When a faculty member is separated, they will no longer have future appointments in UC OATS unless they are re-imported into the system.
Important: Separation in UC OATS applies to the selected fiscal year and one additional fiscal year (+1). For example, if you separate a faculty member in FY 2024–2025, they will also be separated in FY 2025–2026.
Data Preparation
This section walks you through preparing the faculty separation data file for import and explains the required information for each field.
Data Preparation Details
To prepare the faculty separation data file:
- Navigate to App Admin > Data Import.
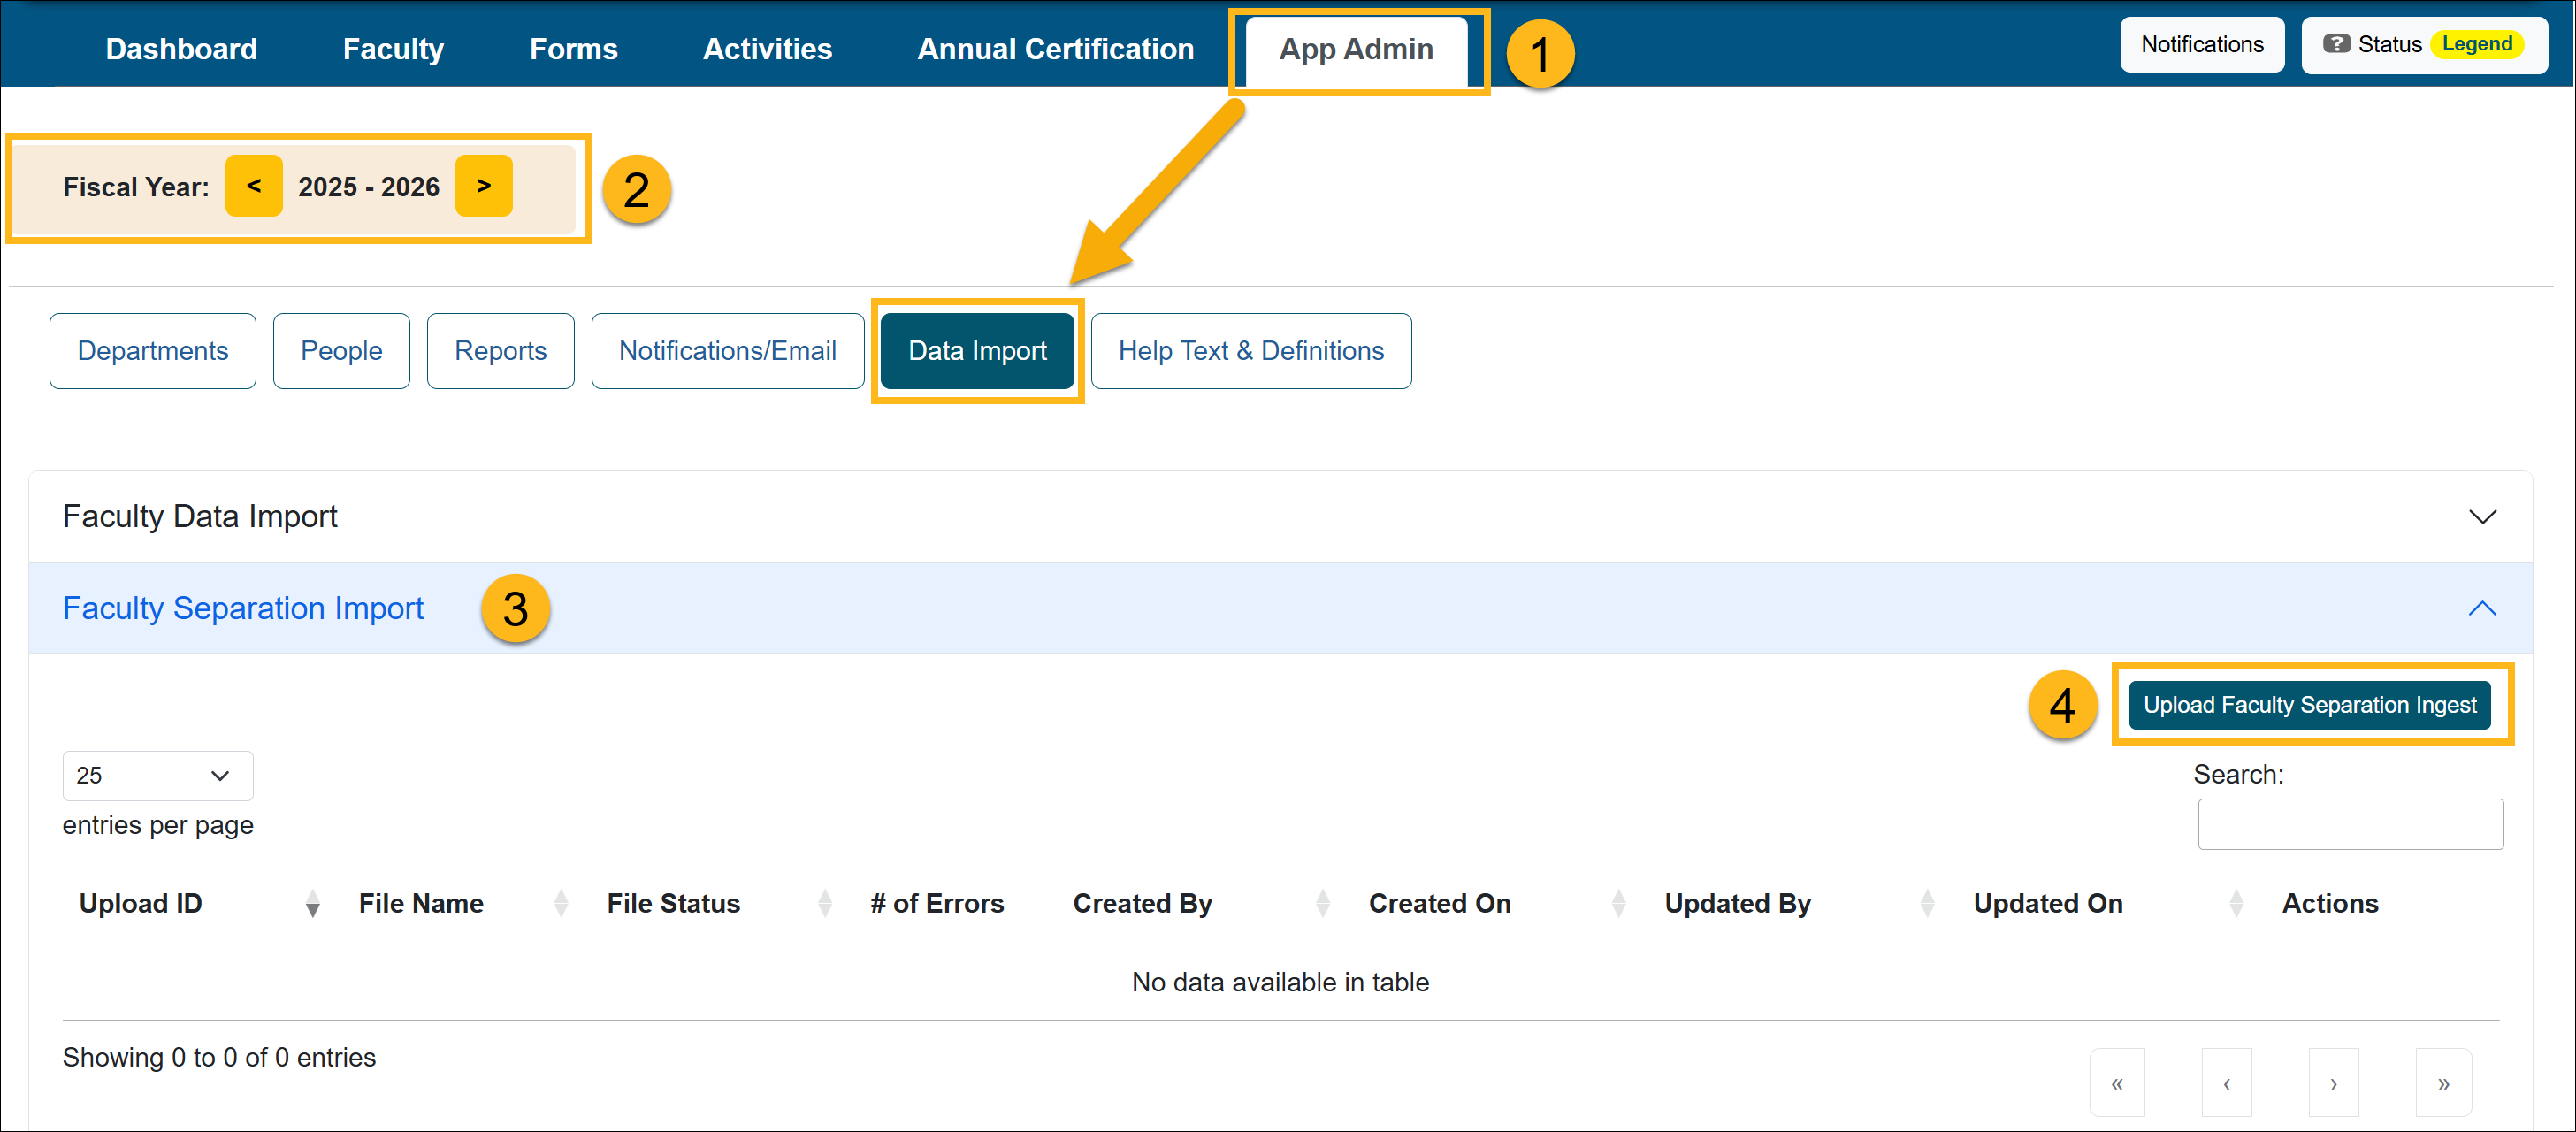
- Select the fiscal year the file should apply to.
- Open the Faculty Separation Import section.
- Select the Upload Faculty Separation Ingest button.
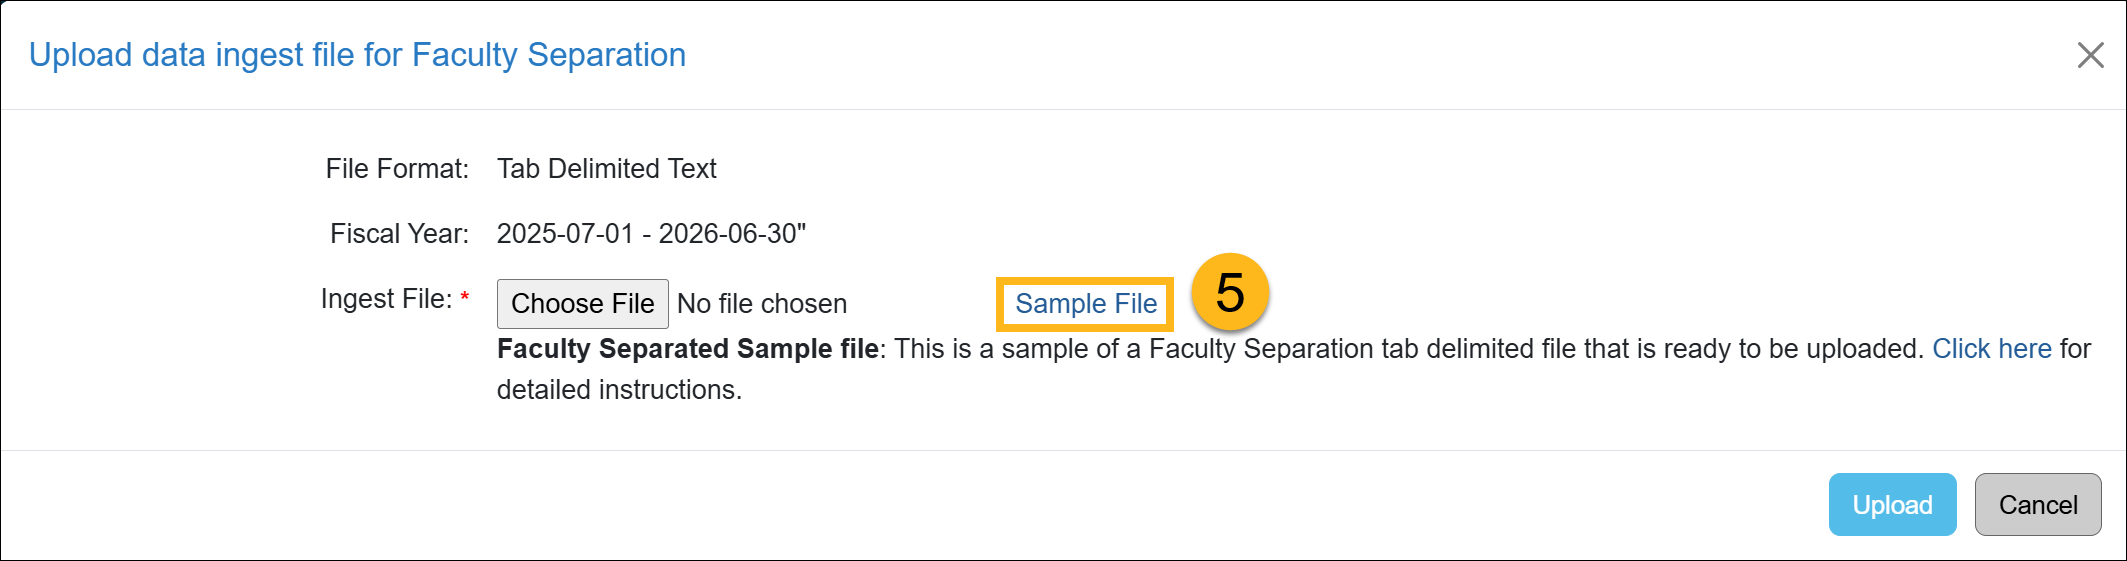
- Download the Sample (TSV) File and rename it.
- Open the file in Excel.
- View the Faculty Separation Data Elements Descriptions below and update the data file. Click Save, instead of Save As. That will keep the file a (TSV) file.
Note:
- All columns must be included in the file, and all must have data.
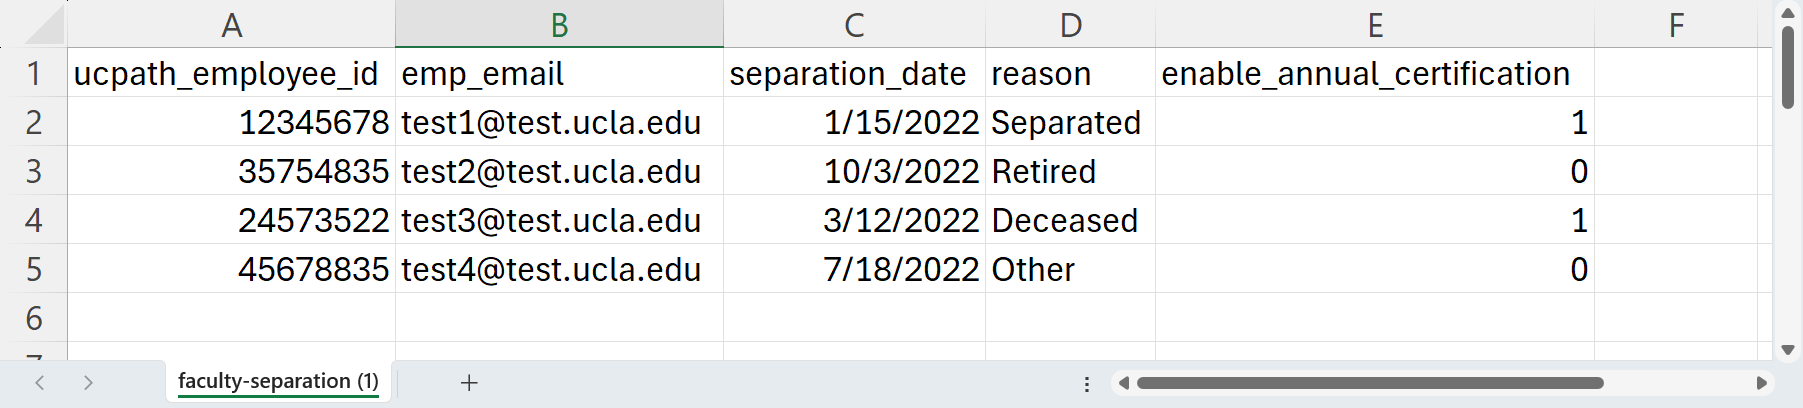
Faculty Separation Data Elements Description
Use the description below to help you fill out the faculty data file.
| Data Element Name | Description | Max size | Required (Y/N) | Accepted Format | Example | Note |
|
UCpath_ |
UCPATH employee ID |
500 characters | Y | Numeric | 12345678 | |
|
emp_email |
University email address used by the faculty. Faculty emails are used for automated emails from UC OATS. This is limited to one email address per faculty member. |
100 characters | Y | Email address | user@ campus.edu |
Limited to one email per faculty |
|
separation_date |
Provide the date the faculty member separated from the university. | Y | MM/DD/YYYY |
01/15/2023 |
|
|
|
reason |
Enter the reason for the separation. The reasons can be any of the following:
|
30 characters | Y | Text | separated | |
| enable_annual_certification | Select if you would like to enable annual certification. When you enable annual certification, an email reminder will be sent to the faculty. | 1 digit | Y | 0 = Do not enable annual certification 1 = Enable and send annual certification reminder email |
1 |
The following email template will be sent to the faculty if you entered 1: “Faculty Separated with Annual Certification Enabled” |
Import Faculty Separation Data
This section will show you how to import the Faculty Separation Data (TSV) file.
Import Faculty Separation Data Details
Once the Faculty Separation Data (TSV) file is ready to upload, do the following:
- Navigate to App Admin > Data Import.
- Confirm you are in the correct fiscal year.
- Open the Faculty Separation Import section.
- Click Upload Faculty Separation Ingest.
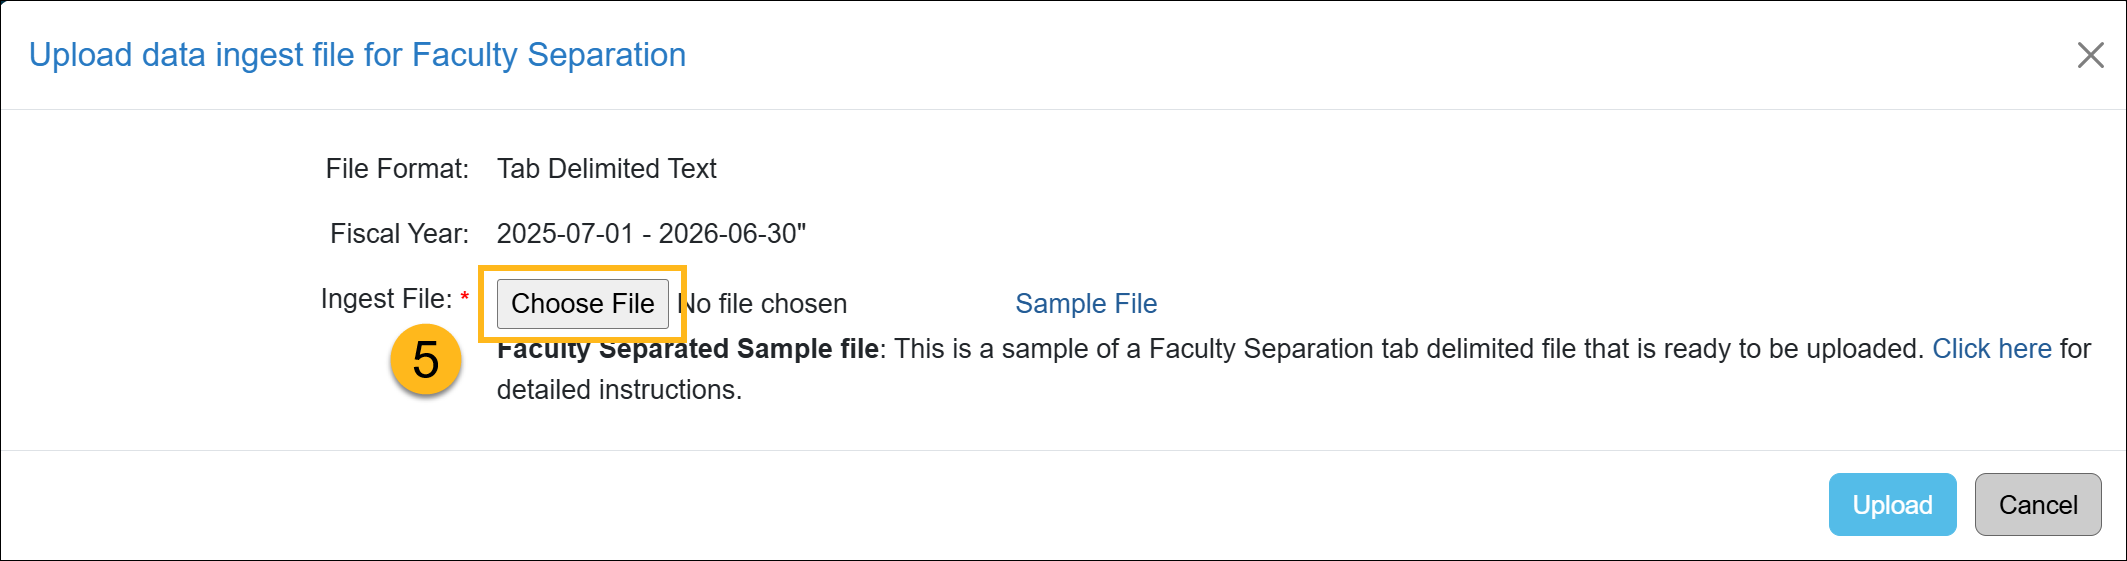
- Select Choose File, locate your data file, and click Upload.
- The file status will change to File Uploaded. Click the Return button to go back to the Data Import section. It may take a few minutes to process the file.
- You may need to refresh your browser. The system will process your file, and one of the following statuses will appear.
- Valid and processed / Complete Successful: The file was successfully uploaded, and there are no errors. The changes will be reflected in UC OATS.
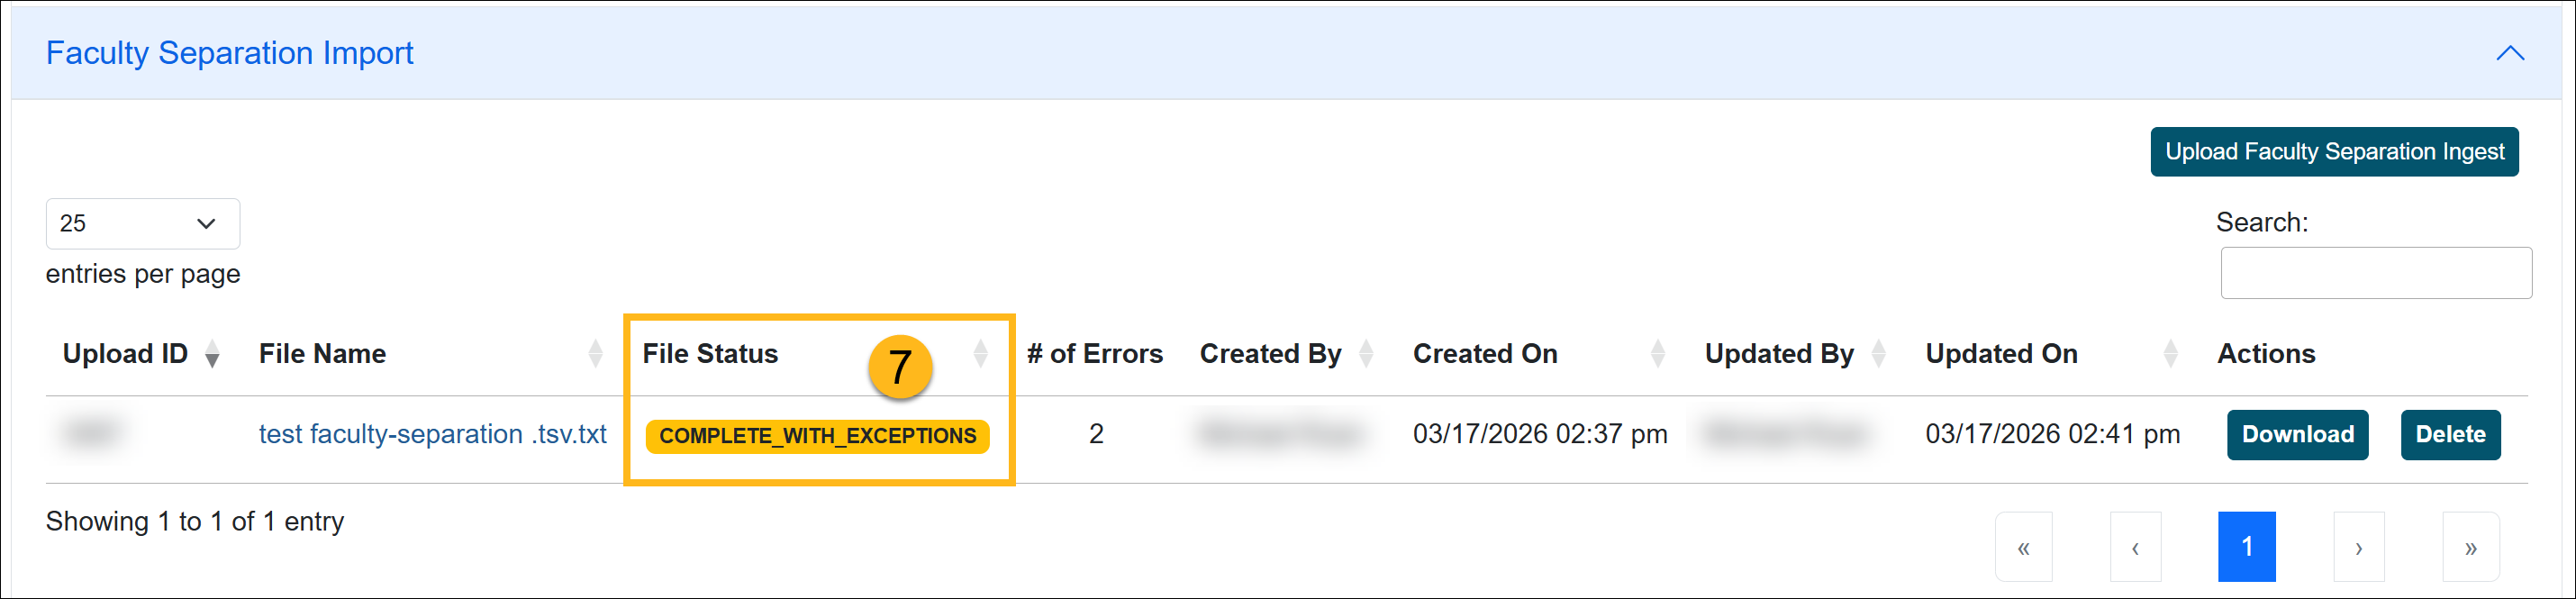
- Complete with Exceptions: The system was unable to process some of the records. The number of errors will be listed.
- Invalid: There is an issue with the file.
- The file is not in Tab-delimited format
- There is no data in the file
- File columns have been removed
Complete with Exceptions Error
When the faculty separation data upload has a Complete with Exceptions status, it means some of the records were successfully uploaded, but other records had errors. This section will show you how to locate the issues and resolve them.
Fix Exception Errors
To resolve the data import errors:
- Select the File Name to view the records.

- Click on the Error Log button to view the issues.

- The records will be listed along with the issues that need your attention.
- Click the Download button next to the Number of Errors. Use that file to make the adjustments.
- Once the errors are fixed, upload the file again. Continue this process until the status is Complete Successful.
Related Articles
Application AdministratorData Import Overview
Faculty Data Import
Faculty Separation Data Import
Staff Data Import
Last Modified:2026-03-17 12:17:04.303292-07